3D Printing
Hello, long time no see and welcome back to my blog! 👻 So, during the holiday, I had a chance to return to school for my 3D Printing project using the Ender 3 V2. It was a very new and exciting😍 experience as I personally find it really cool to be able to 3D print objects. To give a preview for this blog, it will be about the process and challenges😐 I encountered for this activity.
General WorkFlow
1. Creating a printable 3D Design in Fusion360
2. Converting the 3D design into a 3D representable file
(STL or 3MF)
3. Slicing the 3D representable file (STL or 3MF) into
layers using Cura slicer software
4. Converting the layers into instructions for the 3D
printer (gcode)
5. The 3D printer creates the 3D object
Ideation
I thought for a while about what should I design and 3D Print and my initial thought was to do a PokeBall and I did proceed with it but after I 3D Printed the PokeBall, I realized that it can be made easily substratively as it is just a sphere-shaped object. 😥 However, this PokeBall can be adjusted such that it cannot be made substratively and that is to design it such that it can be opened and closed with a hinge. Though I didn't manage to execute this idea, I will still share the process of 3D printing the PokeBall and what I learnt from it and what I designed for the next object to meet the requirement of objects that cannot be made easily substratively.
Process of Designing and 3D Printing PokeBall
Firstly, I designed a PokeBall using Fusion360 and below shows the steps:

Step 1: Click "create a sketch" and select "center diameter circle"
Step 2: Draw a circle with 2.5 cm diameter

Step 3: Select the "line" button
Step 4: Draw a vertical line passing through the origin and the circumferences

Step 5: Select the "center diameter circle"
Step 6: Draw a rectangle that passes through the circumferences at the origin with a breadth of 0.1875 cm


Step 9: Select the "select" button on the pop-up box


Step 16: Draw a circle with a diameter of 2.375 cm at the origin

Step 18: Draw a vertical line passing through the origin and circumferences

Step 20: Select the right side of the sphere

Step 21: Select the "select" button from the pop-up box

Step 22: Place the cursor at the dark blue vertical line and press it. Then, press "OK"


Step 28: Draw a circle with a diameter of 0.75 cm at the origin

Step 29: Draw a circle with a diameter of 0.5 cm at the origin

Step 30: Draw a circle with a diameter of 0.375 cm at the origin

Step 31: Draw a circle with a diameter of 0.3375 cm at the origin


Step 32: Select "extrude" under the "create" tab
Step 33: Select the dark blue area


Step 35: Select the inner part of the sphere

Step 36: Click "OK"

Step 37: Press the "eye" icon to show the sketches

Step 38: Select "extrude" under the "create" tab
Step 39: Select the dark blue area

Step 40: Select "to object" for extent type


Step 44: Select the dark blue area

Step 46: Enter 0.05 cm for distance
Step 47: Select "to object" for extend type


Step 49: Select "new body" for the operation and press "OK"


Step 50: Select "fillet" under the "modify" tab


Step 52: Enter 0.00625 cm as the edges fillet


The final design of the PokeBall
After the completion of the designing stage for the PokeBall, it was converted to STL or f3d files so that CURA Software can recognise the 3D file.
CLICK HERE to access the STL & f3d files of PokeBall
Next, I export the STL file into CURA software to set the Printing Characteristics. See below for the steps:

Step 2: Click "Add a non-networked printer"

Step 3: Click the respective printer to be used. In this case, it is the Creality Ender - 3
Step 4: Click "Add"

Step 6: Find the respective file from the folder and click "Open"

Step 8: Click "Slice" to see the estimated time needed for 3D Printing
 Step 1: Select "create a sketch"
The CURA setting used in this case was 20% infill with support and adhesion. In general, high infill does account for more strength as it uses more material but it also means that the printing time would be much longer. I only used 20% infill because I want to print it fast and not waste the material.
After the Printing Characteristics was set, it was exported into a gcode file so that the 3D Printer can recognise it. Then, the file was saved in a thumb drive to a micro SD card. Then the SD card was inserted into the 3D Printer. After that, choose the respective file from the 3D Printer panel and press "Start" to start printing.
See Below for the whole process of Designing to 3D Printing to Painting the PokeBall. Enjoy! 😆
Problem with my Object
Alright, so I did my PokeBall and realized that it can be easily made substratively. Nonetheless, I think I learnt a lot such as improving my Fusion360 skill. There are new functions that I used this time which I had never done so. They are revolve and plane offset functions. It was very fulfilling to see the result and I always have an end in mind so even though I know this PokeBall did not meet the requirement, I still painted it so that it looks like a PokeBall.
Personally, I don't mind making mistake doing this project, the important thing is to learn from it. That makes me learn a lot more. So, the requirement is to 3D print an object that cannot be made easily substratively. Looking back at my mistake, I understand that it means that the object designed can be easily created using addictive manufacturing which means the object is printed layer by layer and it cannot be easily created using substratively manufacturing which is to create the object manually.
What I did Next to "Save" my Project😂😬
Now that I learnt about it, I wanted to make my PokeBall which can be opened and closed with a hinge but I didn't have enough time to 3D Print it. So, I had changed my mind did something simple. That is to design A Ring in A Ring. This object cannot be made easily substratively as it will take a long time to do it manually from scratch. However, with 3D Printer, it can be made easily as the 3D Printer prints it layer by layer. Refer below to see the process of making A Ring in A Ring.
Process of Making A Ring in A Ring
Step 2: "Select "center diameter circle" under "create" tab


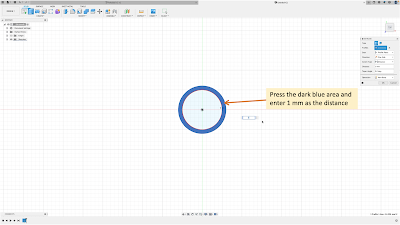

Step 6: Select the dark blue area and right-click on the mouse and select "move/copy"

Step 7: Select "bodies" for the move object on the pop-up box
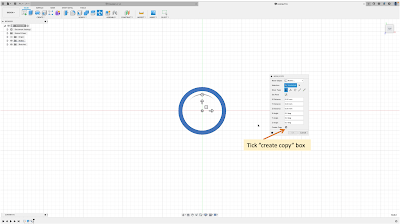


Step 10: Select the dark blue area and right-click the mouse and select "move/copy"

Step 11: Select "bodies" for the move object


After the completion of the designing stage for the Ring in A Ring, it was converted to STL or f3d files so that CURA Software can recognise the 3D file.
Click HERE to access the STL & f3d files of Ring in A Ring
The steps for exporting STL into CURA Software is the same as the one with the PokeBall. Refer to the above section to see the steps. A for the Print Characteristics of Ring in A Ring, please see the photo inserted below.

Similar to PokeBall, the Cura setting was 20% infill with support and adhesion. This is mainly due to saving the material and not wasting too much and support is needed because one of the rings is floating in the air. If there isn't any support, the ring will collapse.
After setting up, the file is saved as a gcode file and inserted into 3D Printer for printing.
Watch the video for the whole process of Designing to 3D Printing the Ring in A Ring. Enjoy! 😬
Reflection
In this 3D Printing activity, I learnt a lot about the technical skill of Fusion360 and Creality Ender - 3 3D Printer. I have never used a 3D Printer before so I had a lot of worry about it. However, after actually experiencing it, it is much easier than I thought. My initial idea was to create a PokeBall but it can be made substratively so it didn't meet the project requirement. Nonetheless, I still finished making the project because I think it is important to finish what I started. I always have an end in mind when I do things. I enjoy making the PokeBall such as designing it with Fusion360 and printing it with 3D Printer and even painting it so that it looks more realistic.
What I learnt is that it is okay to make mistakes, the most important is to learn from them and bounce back. Since I know where I make my mistake, I actually thought of making my PokeBall with a hinge so that it can be opened and closed and it cannot be easily made substratively. However, due to time constraints, I have very little time so I decided to make a smart move by making a Ring in A Ring. It cannot be made easily substratively because it is a ring in a ring and will be hard to do it manually. However, 3D Printing makes it so easy as it prints the object layer by layer.
Here I realize the usefulness of 3D Printer. 3D Printer has made our life so much easier and it would be great if I can utilise them in my daily life. I really find this project interesting and I hope I have the opportunity to do more. I hope to use the skills I learnt from this 3D Printing to print Breathanalyzer which my team is creating and I definitely think I will apply these skills. This experience has made me want to purchase a 3D Printer and print my favourite thing during my own time. I used to think that using a 3D Printer would be hard but after using it, I think it is very manageable. I hope to practice more on Fusion360 by designing objects during my own free time and also hope to master the 3D Printing skill.
Reference
1. MAD' About Designs. (2018) How to design a Pokeball in Autodesk Fusion360 │ Autodesk Fusion 360 Tutorial. 1 October. Available at: https://youtu.be/3sj0xBmqwjE (Accessed: 30 December 2021)
Comments
Post a Comment